Onetone User Manual
Installation & Activation
Onetone-pro is not for free.
After purchasing, check your mailbox and spam box, your will receive a letter from us. The letter provides the username and password for you.
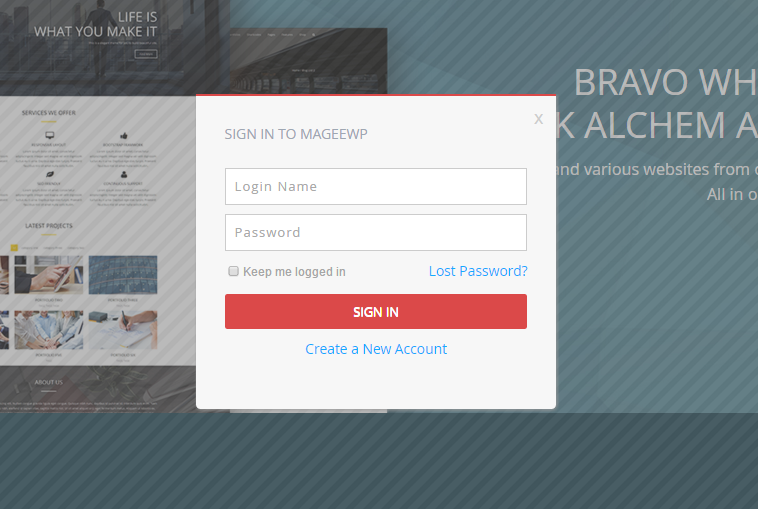
Log in member center of our site.
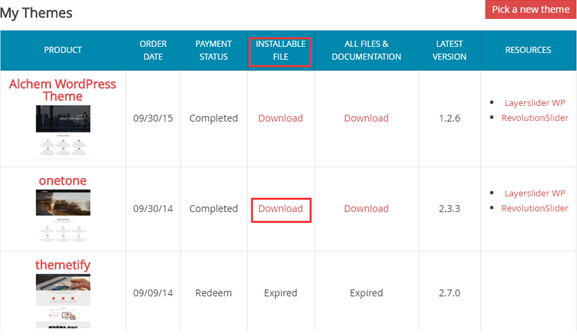
Go to “my themes” and find “Onetone” after logging in.
Click “Download” in the list of “INSTALLABLE FILE“(Notice that only download from INSTALLABLE FILE)
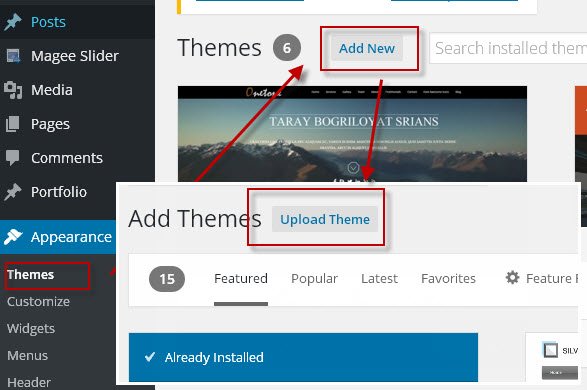
Go to Dashboard -> Appearance -> Themes -> Add New.
Click on ‘Upload’ -> ‘Browse’ ->Load the onetone.zip file you downloaded earlier ->click on ‘Install Now’.
Click the “Activate” link after installation.
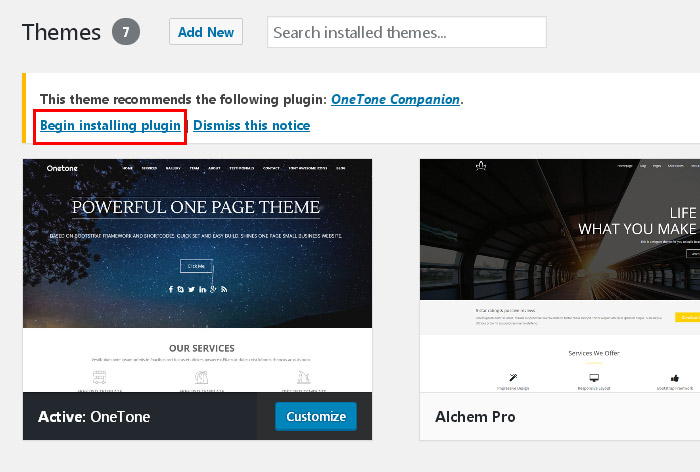
You need to install & activate Onetone Companion plugin too.
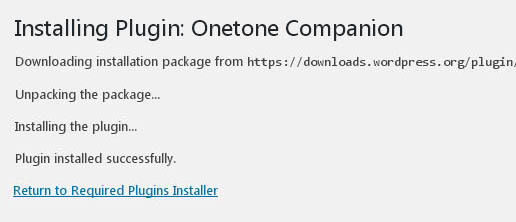
Click the “Begin installing plugin” link to install & activate the companion plugin.
After installation, click the Return to Required Plugins Installer link to activate the plugin.
Since Elementor Pro is included in Onetone Pro, you could choose to install Elementor & Elementor Pro. After the installation, you need to insert the license key to activate Elementor Pro.
Go to member center to copy the license number.
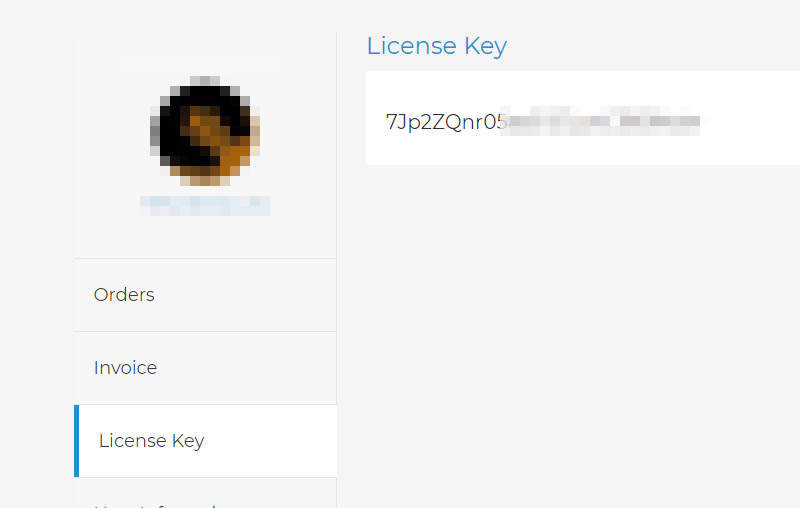
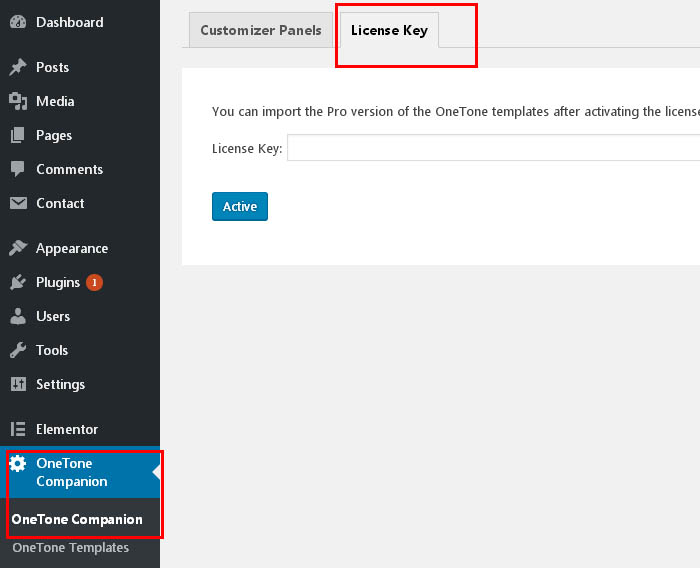
Go to Onetone Companion -> Onetone theme license to paste the code down.
Click the “Activate” button then you would have full access of the Elementor Pro.
More templates are coming soon!
Set up The Front Page
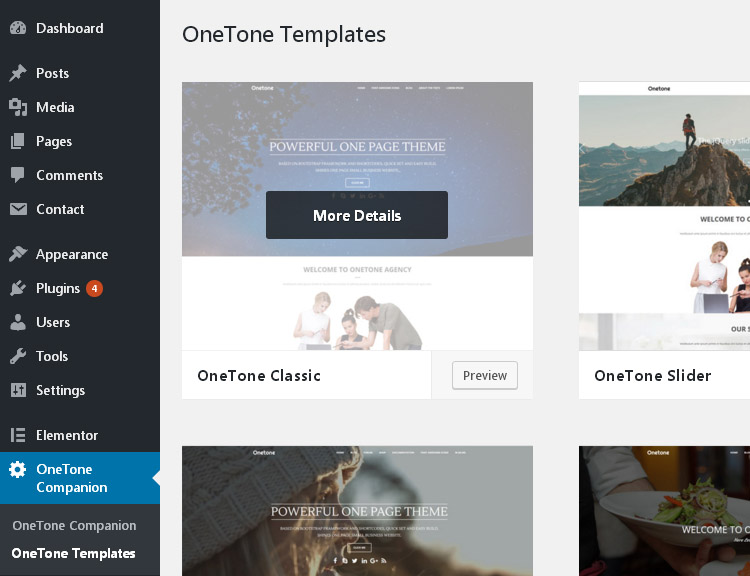
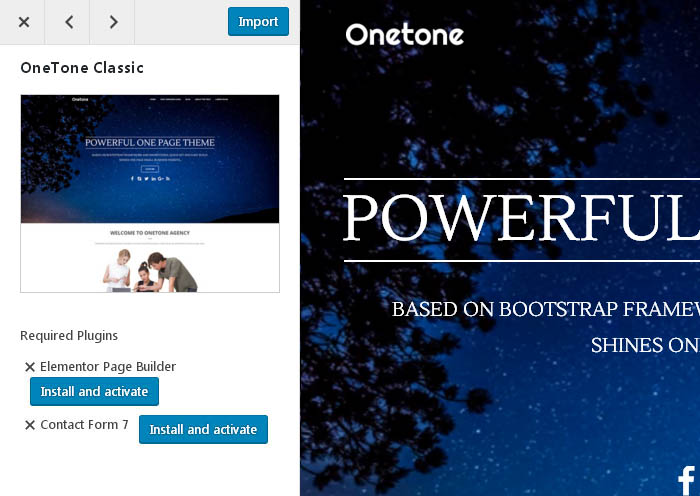
Go to Onetone Companion -> Onetone Templates
Choose to preview the OneTone Classic Frontpage.
Click the “Install and Import” button. (If you have not installed the required plugins, it would take time to download and install plugins before import.)
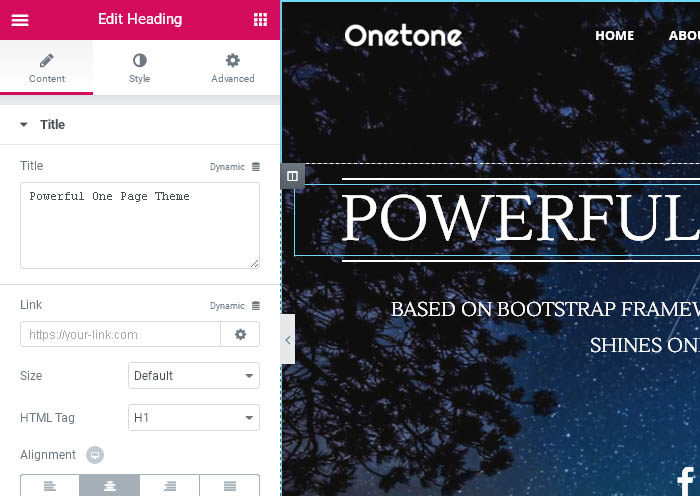
Then you would be directed to the editing page of Elementor. You could edit everything in the front page using this drag & drop page builder. More info could be found at the offical site of Elementor.
This page has already been set as front page of your site.
Create Pages
Go to Dashboard - Pages - Add New to create new pages.
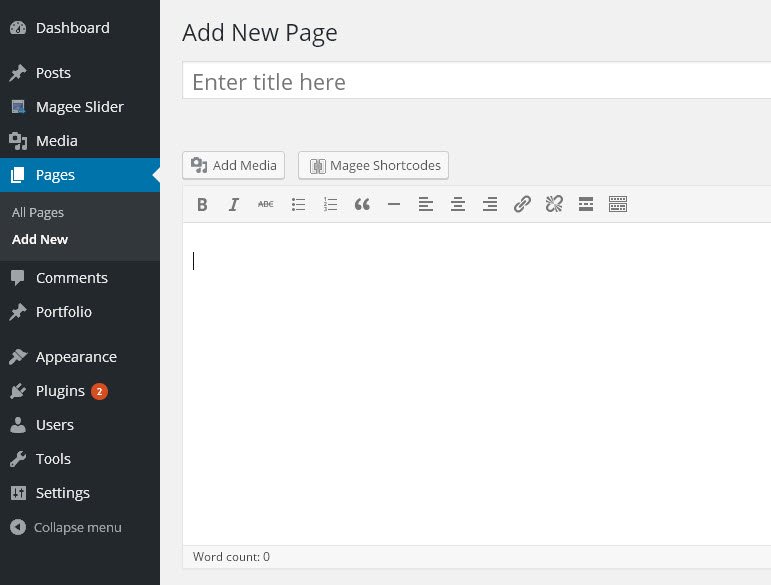
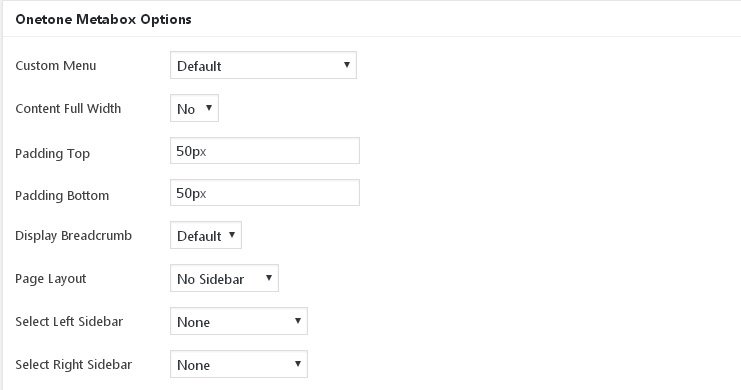
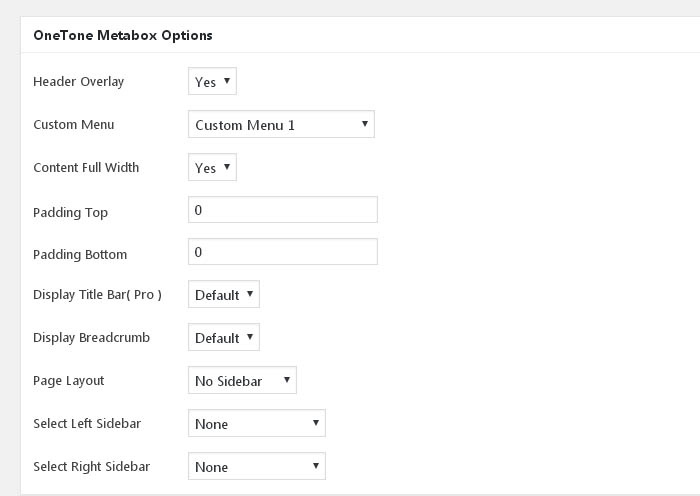
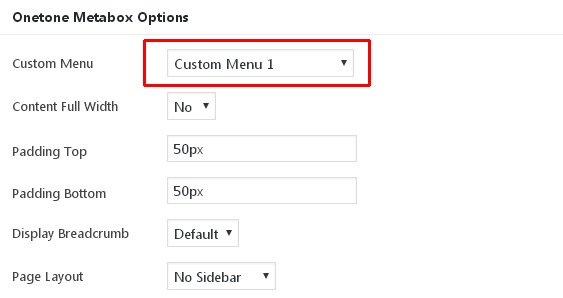
In Onetone, you could edit custom menu, paddings, breadcrumb, sidebar, etc. in Onetone Metabox Options.
Create Blog Posts
Go to Pages - Add New to create a new blank page named “Blog” or any others, then publish it.
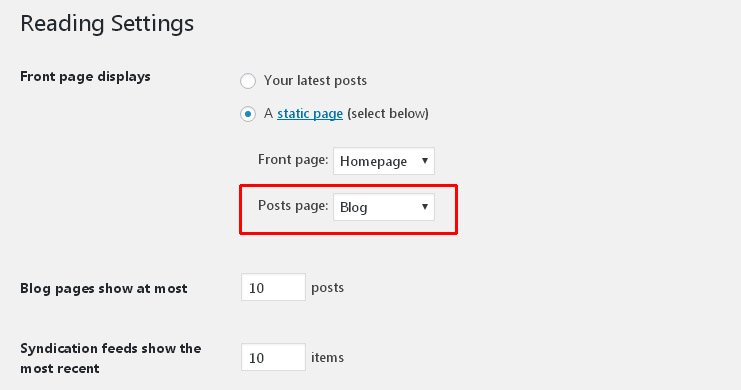
Navigate to the Dashboard - Settings - Reading interface, Check “A static page(select below)”.
In the “Posts page” selector choose the page you created from the drop-down list.
Go to Posts - Add New to create blog posts.
All your posts would be displayed in the blog archive page you created in the previous steps.
Menus
Set Menu for Front Page.
Go to edit front page in dashboard, then you would find custom menu has been set to “Custom menu 1”.
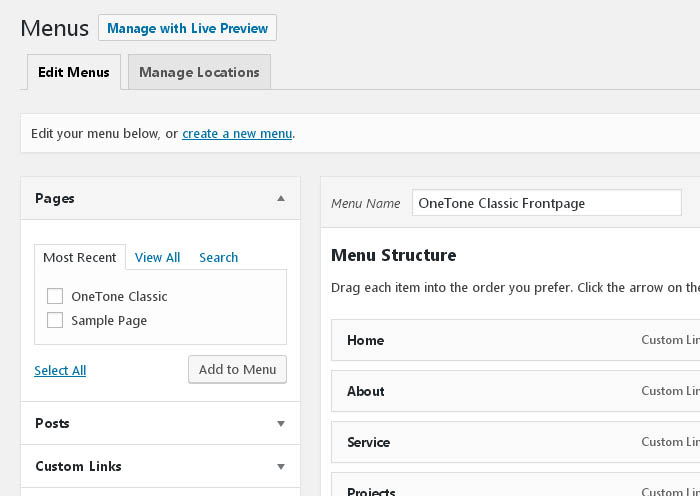
You could choose to set it back to default so the primary menu would display in front page. And you could also go to Appearance -> Menus to edit items for this custom menu.
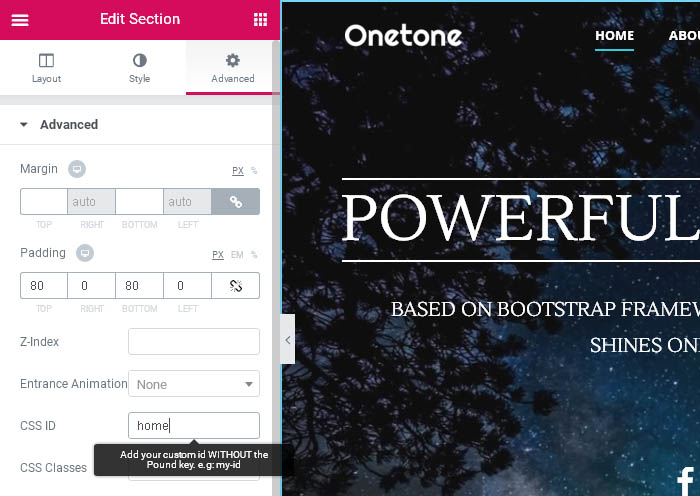
You could add/change id for any section in Elementor to help you build anchor menu.
Create menu for normal pages.
Since Onetone is a one-page scrolling theme, the menu with scrolling effect would only display in homepage. You need to create a menu for other pages like using other themes.
Go to Appearance - Menus - Create a new menu. Set Display location as Primary Menu and save it.
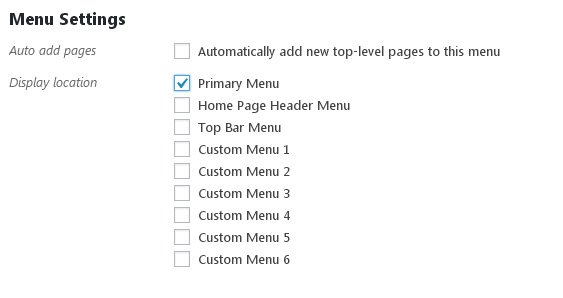
This menu would appear in all pages except homepage.
Create menu for particular pages.
You could also choose a unique menu for any pages.
Go to Appearance - Menus - Create a new menu. Then set Display Location as Custom Menu 1…6.
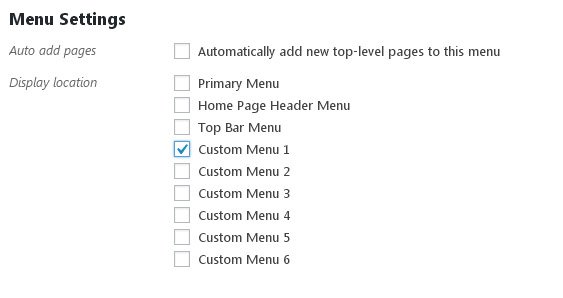
Go to edit the page you want to apply to a unique menu. Choose the menu you created as the Custom Menu in Onetone Meta Options.
Header Settings
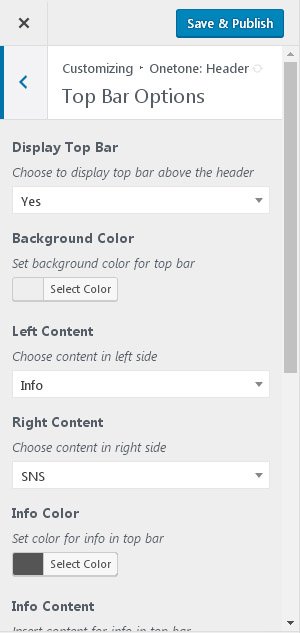
Go to Customize - Onetone: Header to edit contents & styles of the top bar.
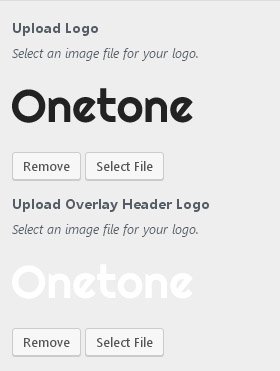
Go to Customize - Onetone: Header - Logo to upload logo for you site.
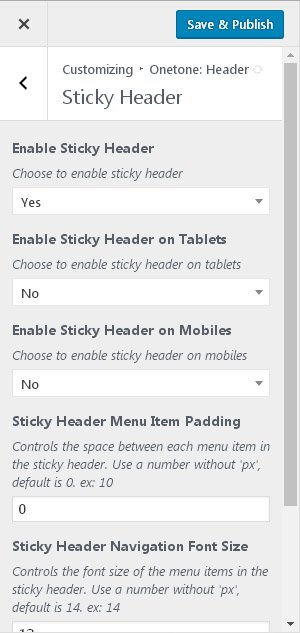
If you have enabled sticky header, remember to upload sticky header, too.
Go to Customize - Onetone: Header - Sticky Header to choose to enable / disable sticky header on various devices.
Footer Settings
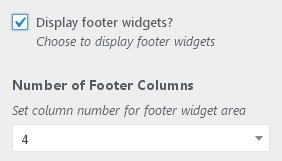
Go to Customize - Onetone: Footer to edit footer widgets area style.
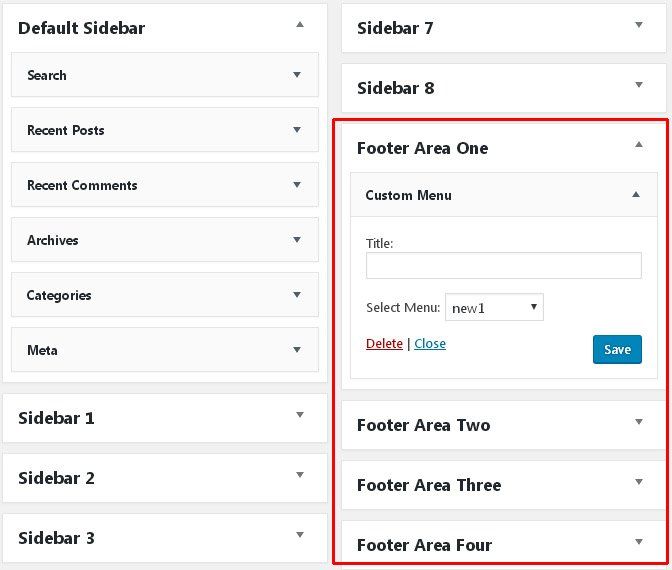
Go to Appearance - Widgets to drag & drop widgets to footer widgets area.
Go to Customize - Onetone: Footer to edit copyright info and social icons.
Other Theme Settings
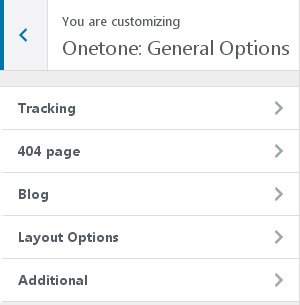
Go to Customize - Onetone: General to set general style for your site.
Go to Customize - Onetone: Page Title Bar to set your page title bar for normal pages.

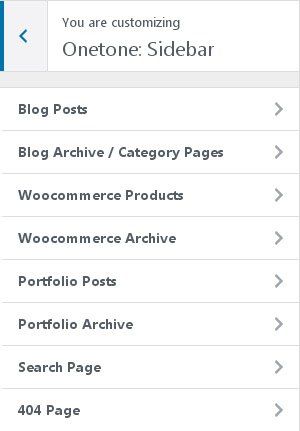
Go to Customize - Onetone: Sidebar to choose sidebar for pages & posts.
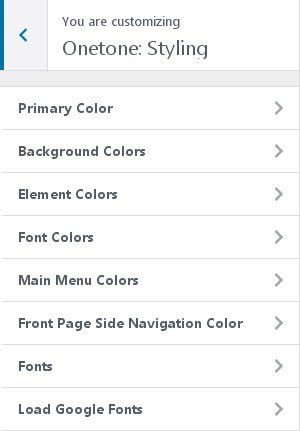
Go to Customize - Onetone: Styling to style your site in details.
You’ve finished your site. Publish and enjoy it.