WordPress Theme Guide: Zippy
Theme Introduction
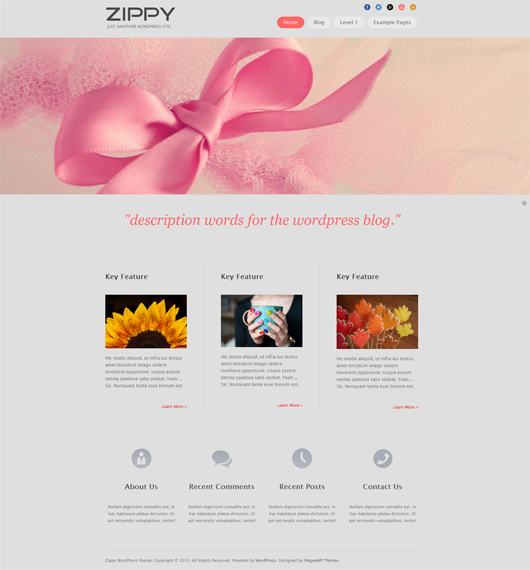
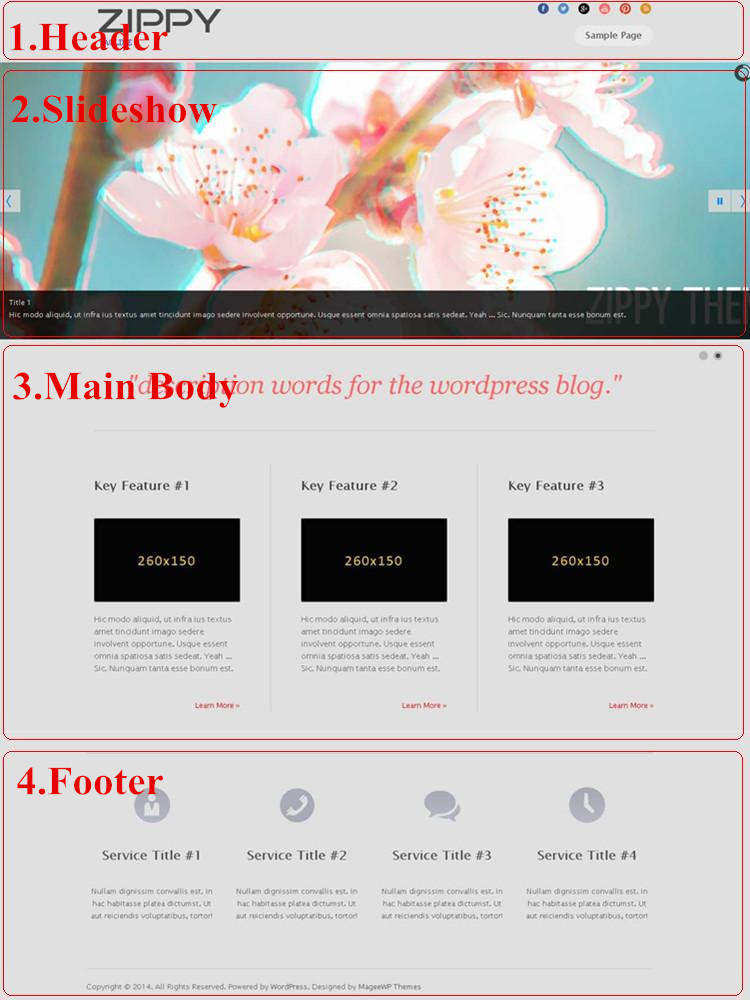
Zippy is a responsive WordPress theme specifically designed for small business. Thanks to the top slideshow in the Home page, Zippy makes your website extremely attractive. With clear and neat layout, the Key Features areas help you to display and introduce your popular products with eye-catching pictures and brief words descriptions, which guarantee direct and effective exhibitions of your products. The Footer Service widget gives you the opportunity to introduce more information to your clients. Flexibility is guaranteed in every process, ensuring your free choice while customizing your own website. The following article is a WordPress theme guide about Zippy:
Main Features
Responsive Design:
The layout adapts to the screen size of a wide range of devices, on desktop, mobile phones and tablets alike. Your visitors can enjoy the same remarkable experience.
Best for Small Business:
Zippy works best for small business website. Use this tidy and elegant theme to present your business to prospective clients.
Multiple Social Icons:
Zippy supports wide range of widgets and multiple social icons (eg: Facebook, Twitter, Google+, YouTube, etc), which is convenient enough for linking to your business partners.
Special Footer Widget Options:
Zippy provides you special footer widget options. You can choose whether active Footer Service widget or not. We recommend you provide more information (such as “About Us”, “Contact Us”, “Recent Posts”, etc.) by using this widget. But if you want to keep your home page clean, you can also choose to hide this area through simply admin panel management.
Flexibility:
Thanks to the advanced styling customization features, you can create endless possibilities by changing navigation styles, backgrounds for each section (header, sections, footer, etc.), with diverse images and patterns.
With all of the advantages and features listed above, Zippy offers you a perfect template for your business website, either aiming at giving information about a business or selling products online.
Get Started
1. Installing the Theme
- Through WordPress.org
- Log in your WordPress dashboard and then navigate to Appearance -> Themes -> Add New.
- Type in “Zippy” in the searching box and click on the Search button.
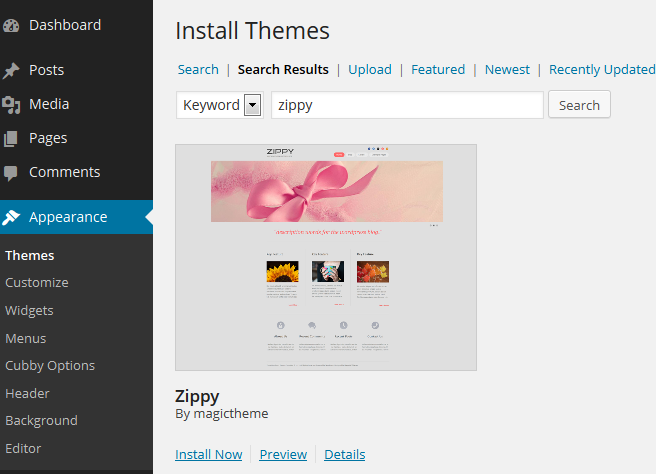
- Click on Install Now.
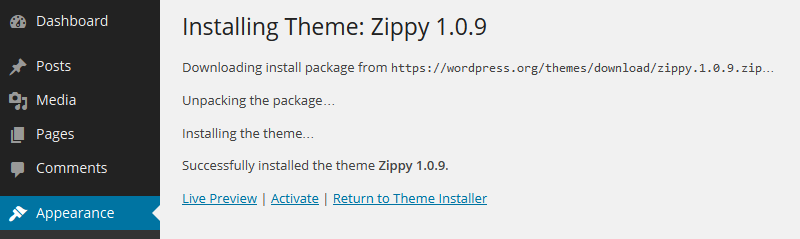
- Once the install process is done click on Activate.
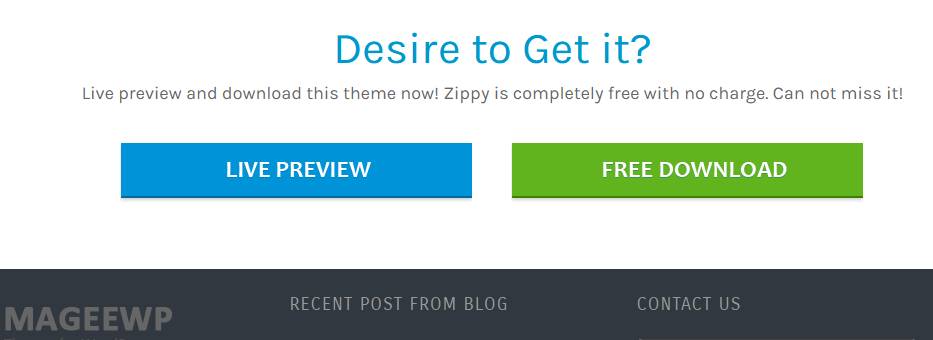
- Through Mageewp.com
- Connect to Mageewp and expand the Zippy section. Click on FREE DOWNLOAD button and download a zippy.zip file.
- Log in your WordPress dashboard and then navigate to Appearance -> Themes -> Add New. Now click on Upload and then on Browse. Load the zippy.zip file you downloaded earlier and then click on Install Now.
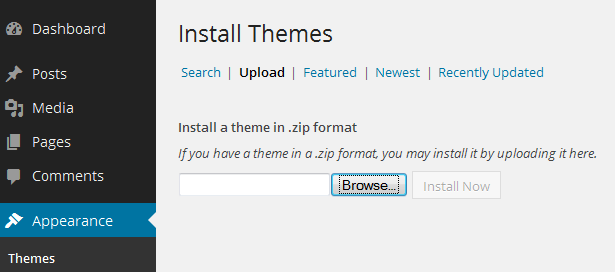
- Once the install process is done click on Activate.
General Settings
1. Header Settings
This part explains how Logo, Favicon, Tagline, SNS Links, and Menus are set.

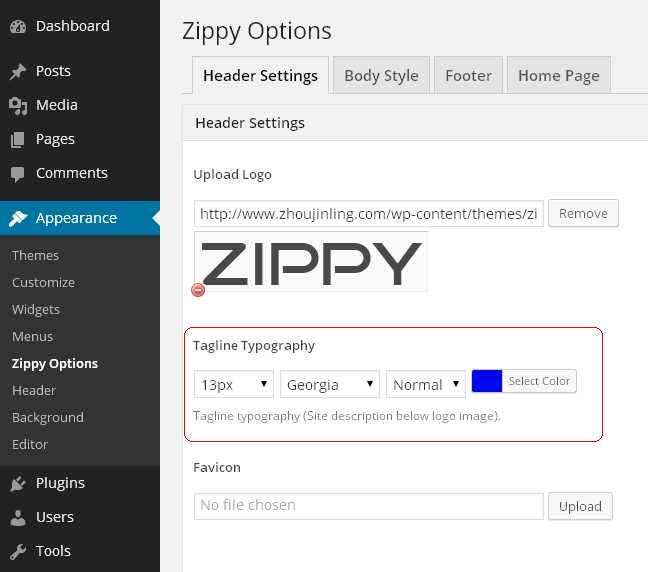
1) Logo and Favicon Setting
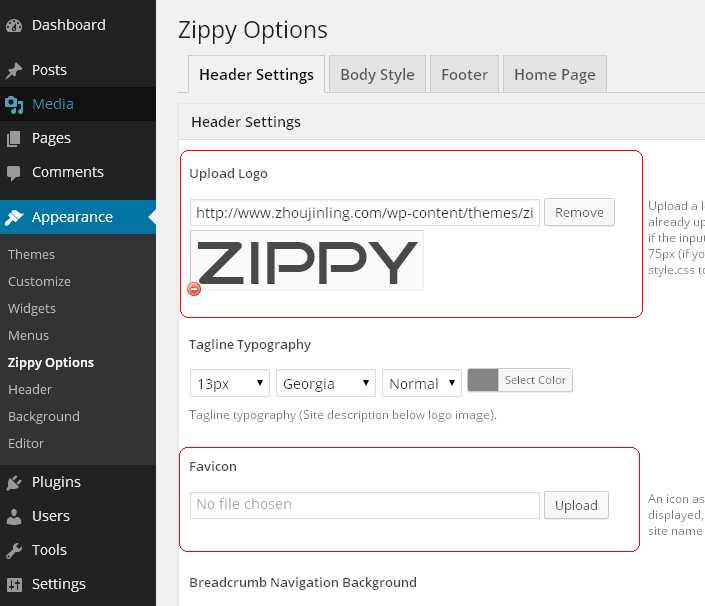
a. Logo: Go to Dashboard -> Appearance -> Zippy Options, navigate to Head Settings. Upload a logo image, or enter the URL to an image if it’s already uploaded.
[Tips.] Logo dimension is 240*75px (If your logo is larger, you might need to modify style.css to align it perfectly.)
b. Favicon: Favicon is an icon associated with a URL that is variously displayed in a browser’s address bar or next to the site name in a bookmark list. Go to Dashboard -> Appearance -> Zippy Options, navigate to Head Settings. Upload your favicon image, or enter the URL to an image if it’s already uploaded.
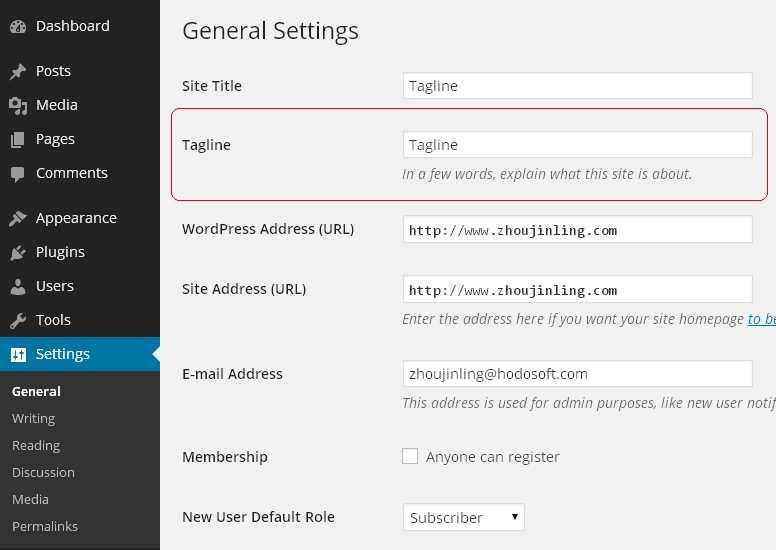
2) Tagline Setting
Go to Dashboard -> Settings -> General, edit your tagline description.
Then move to Appearance -> Zippy Options, navigate to Head Settings, change “Tagline Typography” according to your preference.
3) SNS Links:
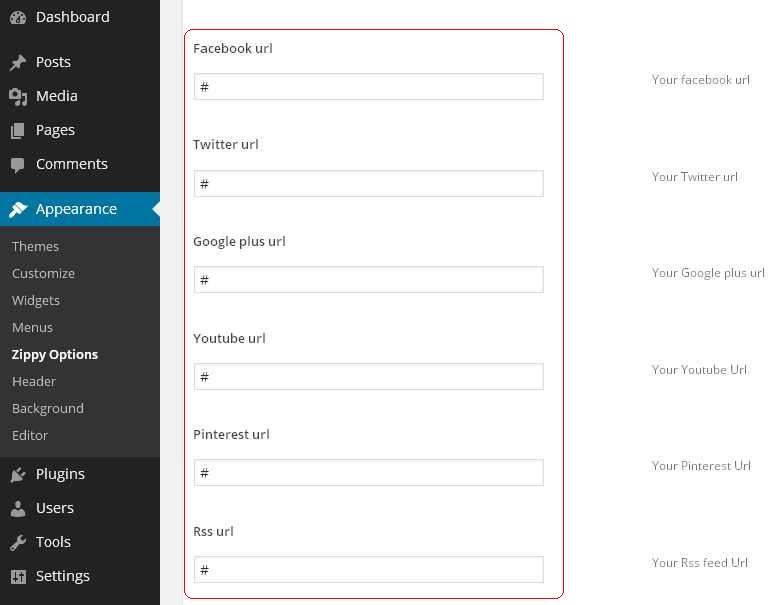
Go to Dashboard -> Appearance -> Zippy Options, navigate to Head Settings, and edit your various SNS Links in the input boxes according. Multiple URLs are provided, including Skype Facebook, Twitter, Google+, YouTube, etc.
4) Menus
a. Create a new menu:
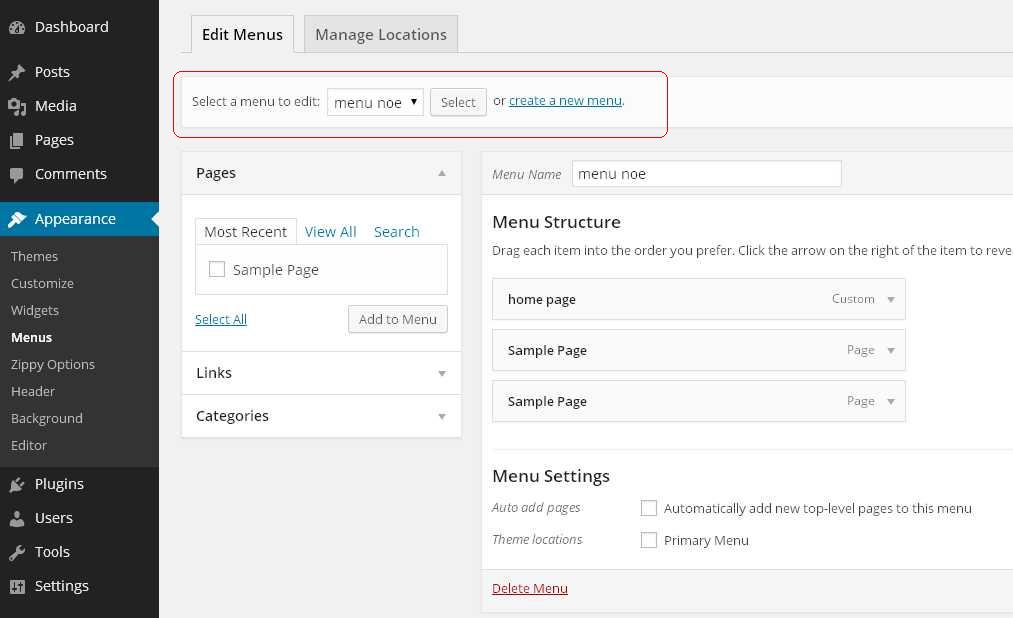
Go to Dashboard -> Appearance -> Menus, navigate to Edit Menus, and click on create a new menu. Type in the name of your new menu in the box, and click on the Create Menu button. You can also select and edit an existing menu through the pull-down menu.
b. Edit your menus:
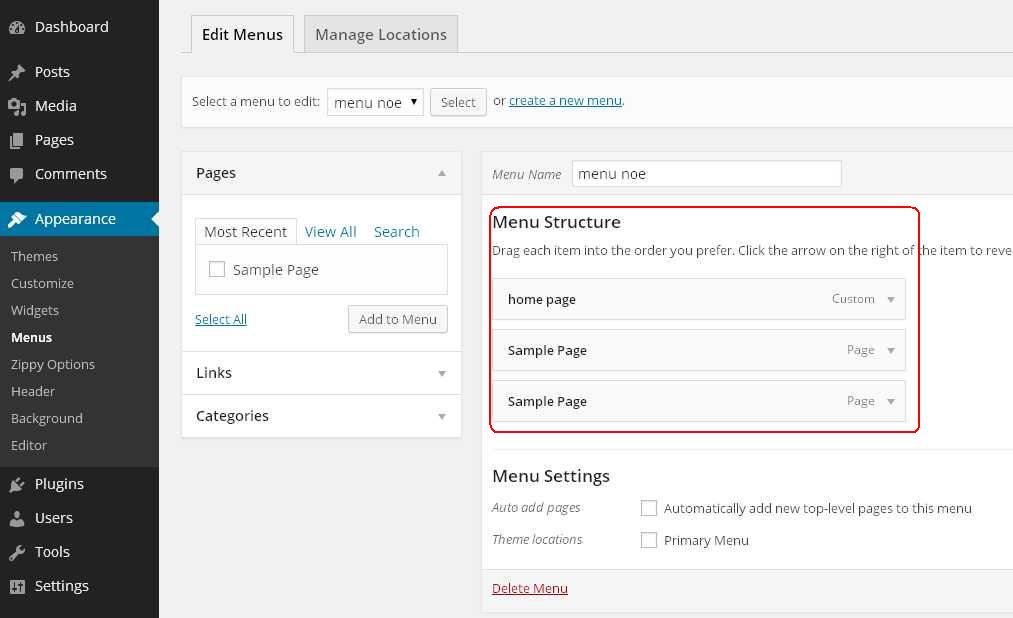
- Add pages: Go to Dashboard -> Appearance -> Menus, navigate to Edit Menus, pull down the Pages selection, choose the according menu name and click on Add to Menu. Then the selected menu name will appear on the right side “Menu Structure” area.
- Add links: Go to Dashboard -> Appearance -> Menus, navigate to Edit Menus, pull down the Links selection, type in URL or link texts and click on Add to Menu. Then the selected menu name will appear on the right side “Menu Structure” area.
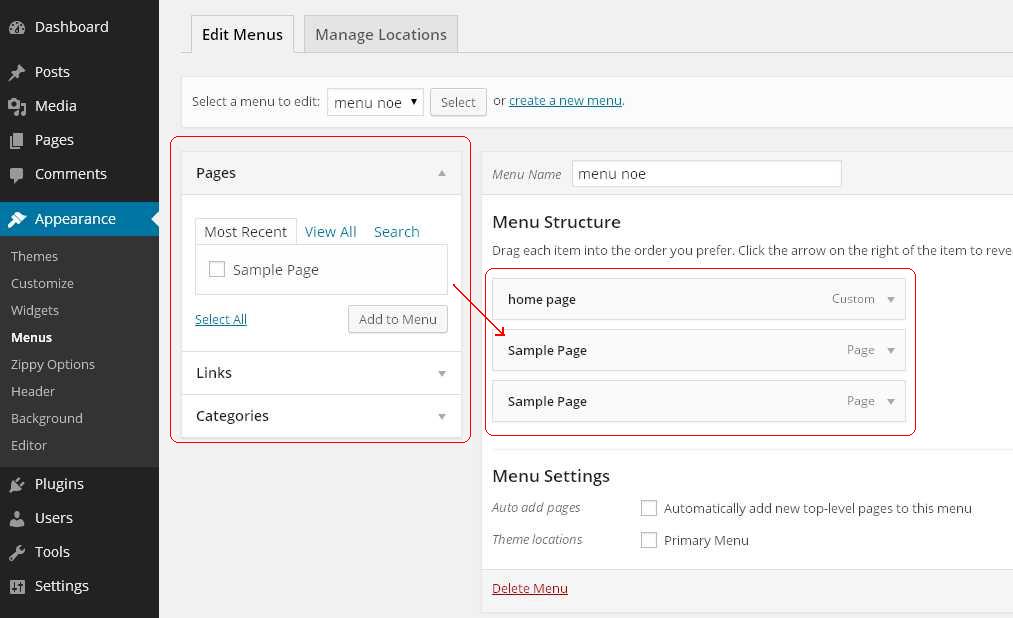
c. Organize your menus:
After adding all the menus that you wanted, you can then organize them on the right side “Menu Structure” area through simply drag&drop actions. It’s also easy to make sub-menu during the process. More specific setting can be done by pulling down the Custom selection.
d. Menu settings:
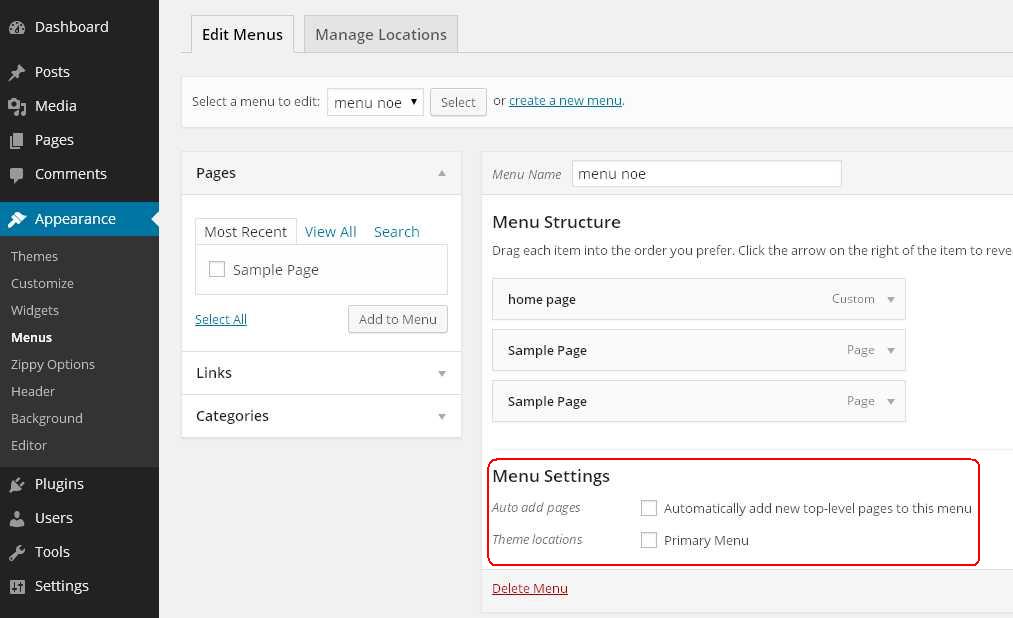
Go to Dashboard -> Appearance -> Menus, navigate to Edit Menus, choose the selections if you prefer to add new top-level pages to this menu automatically. You can also decide the location of the menus, either as header or footer.
e. Manage menus’ locations:
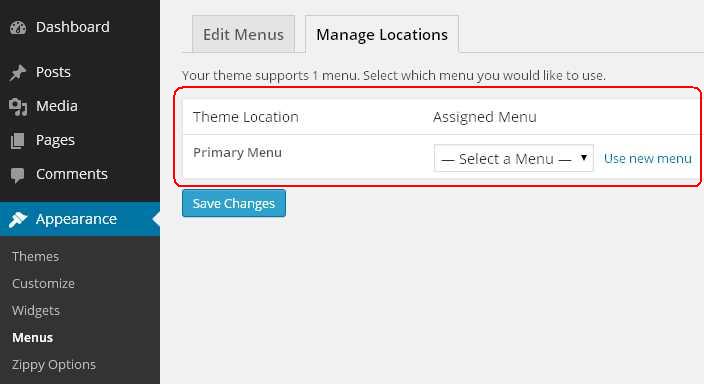
Go to Dashboard -> Appearance -> Menus, navigate to Manage Locations. Zippy supports only one menu. Choose which assigned menu you prefer to put to the “Primary Menu” location. Finally, click on Save Changes.
2. Slideshow Setting
This is the place where you showcase your advertisements through pictures and simple words.
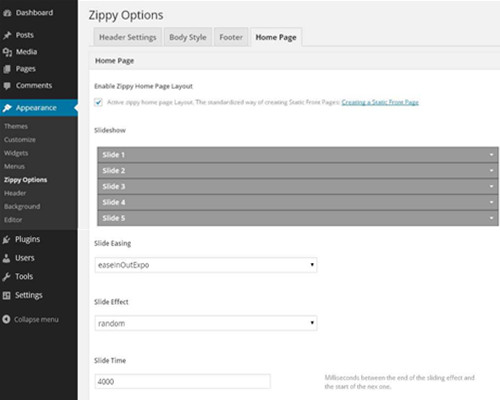
You are allowed to add at most 5 images in the slideshow area. Go to Dashboard -> Appearance -> Zippy Options, navigate to Home Page. Expand the select table, upload image -> type in title -> edit texts -> add a link. You can also manage the slideshow’s display mode by amending “Slide Easing”, “Slide Effect”, and “Slide Time”.
3. Main Body Setting
This section is the most important part of your website, in order to provide main information about your products and latest news.
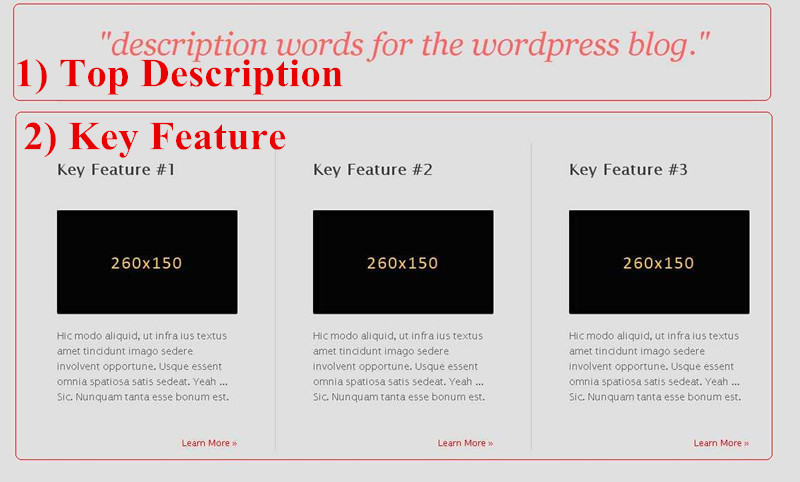
1) Top Description Setting
Add a simple and attractive sentence here as an overall description of your website, helping your customers get to know your business quickly and directly.
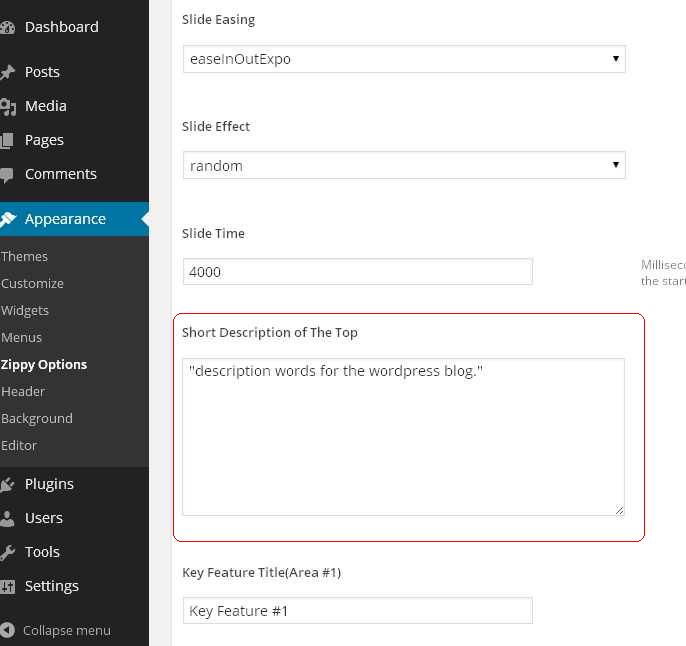
Go to Dashboard -> Appearance -> Zippy Options, navigate to Home Page, type in the words in the box of “Short Description of The Top” area.
2) Key Feature Setting
The Key Feature area is designed for showcase your products with pictures, links, and words descriptions.
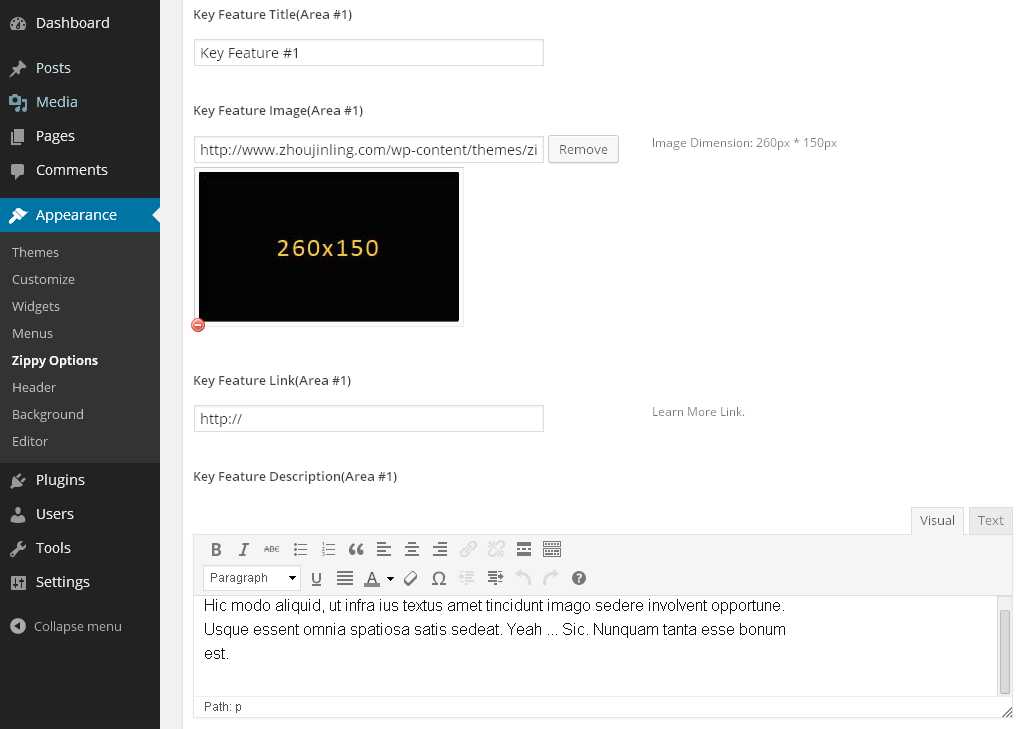
You are allowed to add at most 3 Key Features in this area. Go to Dashboard -> Appearance -> Zippy Options, navigate to Home Page. Edit each feature in the respective “Key Feature” box. Type in title -> upload image -> add a link -> edit description.
[Tips.] Recommended image size: 260*150 px.
4. Footer Setting
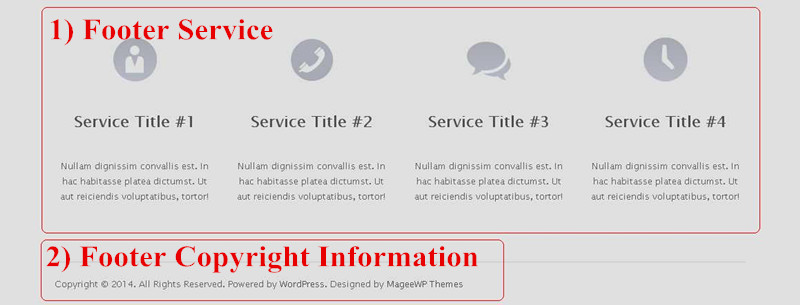
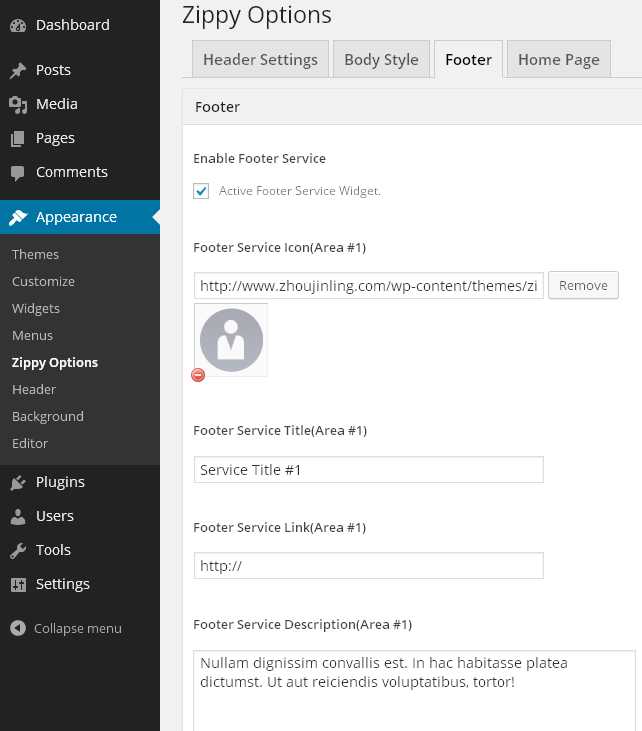
1) Footer Service Setting
Go to Dashboard -> Appearance -> Zippy Options, navigate to Footer
You can choose whether active Footer Service widget or not. If not, do not tick the option. If you want to use this widget as a method to provide more information (such as “About Us”, “Contact Us”, “Recent Posts”, etc.), tick the box to active the Footer Service widget.

You are allowed to add at most 4 Footer Services in this area. Upload an image as icon -> type in a title -> add a link -> edit description.
2) Footer Copyright Information (cannot be amended)
5. Other Settings
1) Content Typography Setting
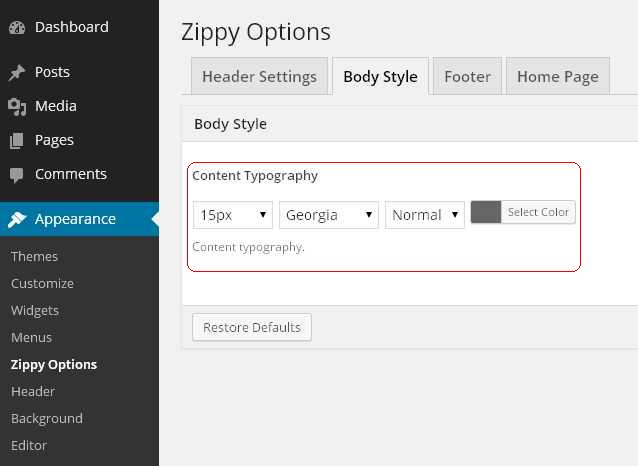
Go to Dashboard -> Appearance -> Zippy Options, navigate to Body Style. Manage the body style in the “Content Typography” area.
2) Breadcrumd Navigation Background Setting
“Breadcrumd Navigation Background” is the background image or color of every page other than the Home page.
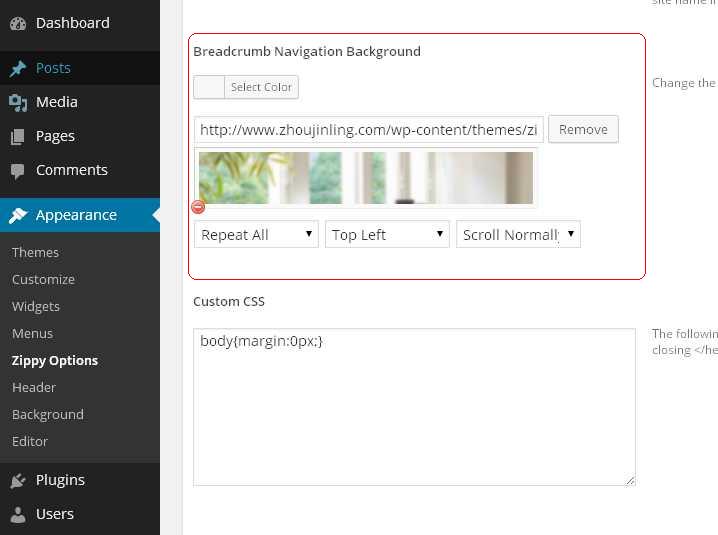
Go to Dashboard -> Appearance -> Zippy Options, navigate to Header Settings, choose the background color or upload an image in the Breadcrumd Navigation Background area. More specific settings can be amended in the pull-down menu boxes, including repeat mode, location and state.